Pelican is a static site generator written in Python.
In this blog post, you'll learn how to create your first Pelican site and how to style it using a custom theme. This tutorial assumes you have a good grasp on HTML, CSS, and basic command line input. Familiarity with the Jinja2 templating engine is not required but nice to have.
Despite being written in Python, Pelican only forces you to interact with Python via its config file - so aside from using pip and setting up a proper venv (which we'll cover in this tutorial), you don't really have to know any Python to get a site up and running with Pelican.
This tutorial also assumes you're using a UNIX-like OS (Linux, MacOS). If you're still using Windows, get rid of it already.
Article Navigation
Before we get started...
You might be asking yourself, "Why build a static site in the first place? Aren't those outdated? Why not just use a one-click WordPress installer or <insert popular web framework here>?"
The sad reality is, the modern web is a bloated abomination. Simple static sites free of unnecessary JavaScript help to combat this distressing trend.
If you think about it, most sites for personal or small business use do not require JavaScript or even server-side data processing. Your local pizza joint would be just fine with a series of HTML pages that look nice and relay necessary information to hungry customers - location, menu, hours, contact information, etc. If Local Pizza, Inc. wanted to add an online order form at some point, they could create a page where a single component enables that functionality without forcing it on the entire site.
This is even more true of personal sites and blogs like this one. There's simply no need to have some insecure, computationally expensive PHP Content Management System or bloated front-end framework just to serve up some text and image files.
With that out of the way, let's dive in!
Installing Pelican
Since we're working with Python packages, let's start by creating a proper virtual environment for our project:
mkdir pelican-site && cd pelican-site
python3 -m venv venv
source venv/bin/activate
This will make things a lot easier when it's time to deploy as you can lock your Python version and packages to a requirements file.
Now that we've created a project directory and activated our virtual environment, we can go ahead and install Pelican and Markdown via pip:
pip install "pelican[markdown]"
From here, run the command pelican-quickstart and go through the setup wizard to generate your config files. Since we're developing locally, feel free to leave any questions about deployment environments or URLs blank for now.
The way Pelican (and most static site generators) work is by processing raw Markdown or HTML files to populate your website with pages and posts. We'll need to create an example post in order to build our theme - the Pelican quickstart script was kind enough to make us a content directory to place our files in, so let's add a Markdown file to it for testing purposes:
cd content && touch hello-world.md
Since an empty Markdown file won't do us much good, let's add some content. Copy and paste this into hello-world.md using your text editor of choice:
Title: My First Review
Date: 2010-12-03 10:20
Category: Review

Following is a review of my favorite mechanical keyboard.
Now that we have everything set up, we can generate our static site with the command pelican content. In your file manager, you'll notice that Pelican has created a new directory called output where our static site assets reside. Use the command pelican --listen to float a local server and check out your new site at http://127.0.0.1:8000:
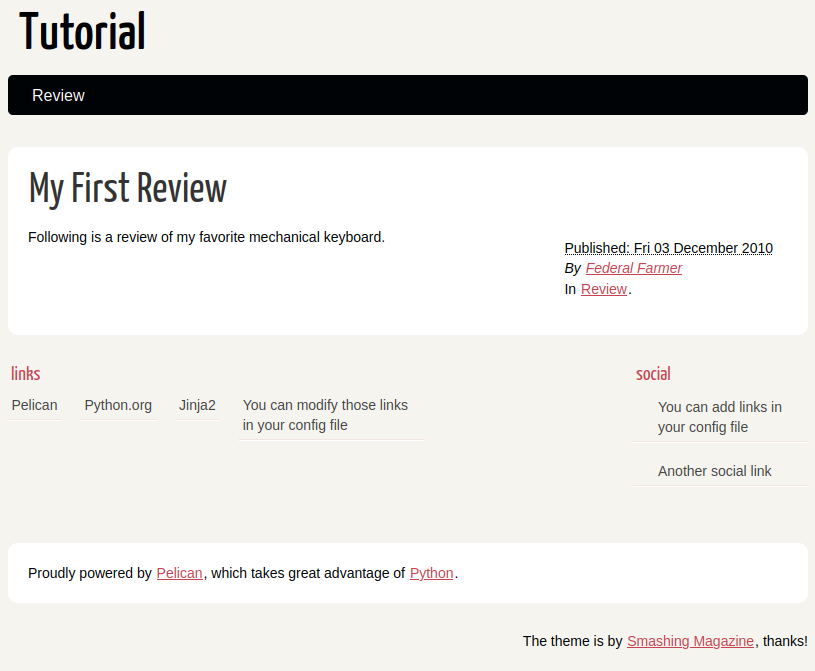
Congratulations! You've just created a fully functional website. If you're not interested in adding additional functionality or creating a custom theme, you could use one of Pelican's many prebuilt themes, deploy your site on your VPS of choice, and call it a day.
Given that this post is entitled "Creating Custom Themes With Pelican," though, I'm going to assume you want to... y'know... create a custom theme ;)
Fixing Pelican's annoying dev environment
If you're coming from a web framework with a built-in development server like Flask, you're probably very spoiled. Most development servers will automagically detect changes in your app and restart the server, so every time you refresh your browser, your edits are displayed in real-time.
That's not how Pelican works.
To be fair, this isn't Pelican's fault. It's inherent to how static site generators work. Rather than serving your files and front-end assets directly from the templates you're working with, static site generators have to transpile your site into separate assets, which are then served up via HTTP. That's the purpose of the output directory mentioned earlier: To hold the files Pelican generates for ultimate consumption by your site's visitors. All we're doing is providing Pellican the instructions on how we want it to build our site.
Why is this annoying for development? Because it means that, for every change we make, we have to:
- Generate a new set of
outputs usingpelican content - Float the Pelican dev server using
pelican --listen - Stop the server, repeat steps 1 and 2, and hard-refresh (
Ctrl + Shift + R) our page to view the changes
With a bit of shell scripting, we can easily combine steps 1 and 2 into a single file run.sh:
pelican content -s pelicanconf.py && pelican --listen
Now all we have to do is use our ./run.sh script every time we want to see our changes. Significantly less annoying.
I'm using the -s flag in this script to tell Pelican to pull our configuration variables (like the location of our theme) from pelicanconf.py instead of invoking them in-line.
Generating our theme's structure
Finally! We've reached the part of the Pelican themes tutorial where we actually create a theme.
Pelican's very thorough documentation tells us we should use the simple theme as a jumping off point. Let's go ahead and do that. Open up your pelicanconf.py file and add the following line:
THEME = 'simple'
Then build and float your theme with the ./run.sh script we made earlier. As you can see, the simple theme certainly lives up to its name - it has no styling at all:
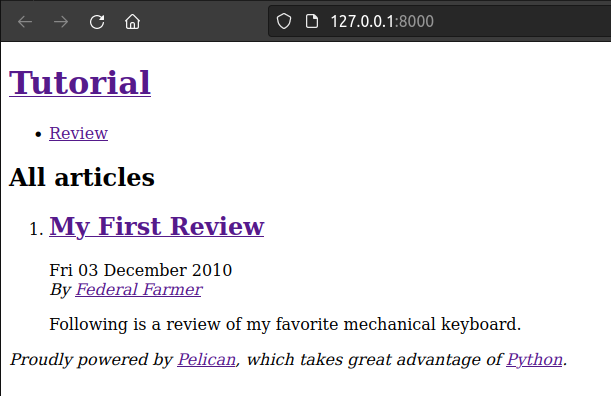
Perfect. That means it'll serve as the ideal canvas for making our own changes. The simple theme is actually included with Pelican, so all we have to do is copy this theme to our own theme directory. There's a good utility called pelican-themes to deal with theme files, so go ahead and install it:
pip install pelican-themes
Once installed, run the following to display the directory of the simple theme:
pelican-themes -l -v
If you're using a proper virtual environment, the theme should be located in a directory that looks something like venv/lib/python3.10/site-packages/pelican/themes/simple. Let's create a directory for our own theme and copy the files from simple into it:
mkdir themes && cd themes
cp -r ~/pelican-site/venv/lib/python3.10/site-packages/pelican/themes/simple ~/pelican-site/themes
mv simple my-theme
Now all the contents of simple have been copied to the directory themes/my-theme. Makin' progress. We can now change our pelicanconf.py file to reference our custom theme instead of simple:
THEME = 'themes/my-theme'
By bootstrapping our own theme from the simple theme, we're saving ourselves a ton of work. Simple already conforms to Pelican's required file structure and also includes a good amount of Jinja2 (Pelican's templating language) logic to give our site basic functionality without having to reinvent the wheel.
Importing some CSS
Now that our my-theme directory is populated, it's time to import some CSS!
For this tutorial, we'll be using the Bulma CSS framework.
Why Bulma? It looks good, it's easy to use, and most importantly, it's a CSS-only framework without a bunch of unnecessary JavaScript. Bulma has a flexbox-based grid system built-in and some very useful pre-built components. I ain't no designer, so this is a huge help in making a decent looking and fully responsive site without too much hassle. Of course, if you have a preferred CSS framework (or are a no-framework Chad), just use whatever you like.
To import Bulma, go ahead and open up the base.html file and import it somewhere in the <head> tag. Personally, I would recommend downloading Bulma and putting it in the static/css directory of your theme. We're building a simple static site, after all, so why complicate things by adding external dependencies?
For the sake of simplicity, though, you can also import Bulma via CDN:
<link rel="stylesheet" href="https://cdn.jsdelivr.net/npm/bulma@0.9.4/css/bulma-rtl.min.css">
Speaking of our static/css directory, we'll need to make another stylesheet to hold any changes we might make to override Bulma's defaults:
touch ~/pelican-site/themes/my-theme/static/css/custom.css
...and import it in base.html as well:
<link href="/theme/css/custom.css" rel="stylesheet" type="text/css">
Note that the path we're using for custom.css is not to our my-theme directory. We're pointing to the directory where our CSS will end up after output is generated.
Now if we call ./run.sh again and look at our site, the appearance has already improved a bit!
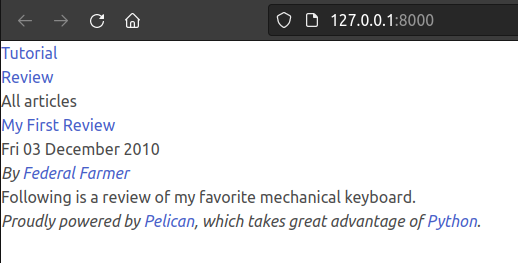
Messin' with templates
In our theme, base.html is the skeleton for the entire site - all other components are extensions of this template.
Let's take a closer look at the <body> of base.html:
<body id="index" class="home">
        <header id="banner" class="body">
                <h1><a href="{{ SITEURL }}/">{{ SITENAME }}{% if SITESUBTITLE %} <strong>{{ SITESUBTITLE }}</strong>{% endif %}</a></h1>
        </header><!-- /#banner -->
        <nav id="menu"><ul>
        {% for title, link in MENUITEMS %}
            <li><a href="{{ link }}">{{ title }}</a></li>
        {% endfor %}
        {% if DISPLAY_PAGES_ON_MENU %}
          {% for p in pages %}
            <li{% if p == page %} class="active"{% endif %}><a href="{{ SITEURL }}/{{ p.url }}">{{ p.title }}</a></li>
          {% endfor %}
        {% endif %}
        {% if DISPLAY_CATEGORIES_ON_MENU %}
          {% for cat, null in categories %}
            <li{% if cat == category %} class="active"{% endif %}><a href="{{ SITEURL }}/{{ cat.url }}">{{ cat }}</a></li>
          {% endfor %}
        {% endif %}
        </ul></nav><!-- /#menu -->
        {% block content %}
        {% endblock %}
        <footer id="contentinfo" class="body">
                <address id="about" class="vcard body">
                Proudly powered by <a href="https://getpelican.com/">Pelican</a>,
                which takes great advantage of <a href="https://www.python.org/">Python</a>.
                </address><!-- /#about -->
        </footer><!-- /#contentinfo -->
</body>
Everything with {{ curly_braces }} is a Jinja2 variable. Everything with {% whatever_this_is %} are for programmatic logic - conditionals, loops, logical operators, etc. As you can see, there's a lot of variables here in ALL_CAPS. These are actually being pulled from our pelicanconf.py file - whatever you change in that single config file will affect your entire site!
Pretty neat.
In addition to pulling in simple variables like your SITENAME, this template is also executing some conditional statements and looping through items like Pages and Categories. Let's break down the templating logic for Pages in the above code:
{% if DISPLAY_PAGES_ON_MENU %}: If this variable is set toTrueinpelicanconf.py, Jinja2 executes the next code block, which is...{% for p in pages %}: This loops through all your static pages and adds them to a list for display<li{% if p == page %} class="active"{% endif %}><a href="{{ SITEURL }}/{{ p.url }}">{{ p.title }}</a></li>: This list element is dynamically generated with your page links and sets the CSS classactivefor additional styling if you're on the page in question- All of this is wrapped in a
<nav>element, so this is your site's main navigation bar
But wait... we don't have any Pages set up yet! Let's go ahead and add one - every decent blog has a Contact page, so we can start there:
cd content && mkdir pages
cd pages && touch contact.md
Go ahead and populate contact.md with your email address:
Title: Contact
Date: 2010-12-03 10:20

Email: `your_email@fakedomain.com`
Now if we check out our site, you'll see that the Contact page has been dynamically added:
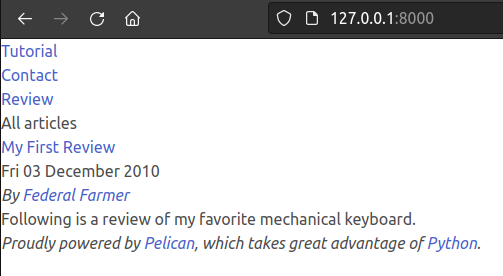
Hopefully you're starting to see how powerful Pelican's templating system is - with just a few config variables, some Jinja2 logic, and HTML + CSS, we can generate static sites that completely conform to our needs with little to no coding required once the theme is completed. Pelican has a ton of settings that can be configured from pelicanconf.py, so I'd recommend familiarizing yourself with them to see if any of them suit the needs of your project.
Before we continue, I should note that this isn't a tutorial on Jinja2 or Bulma - it's a high-level overview of how to create themes for Pelican, so please refer to the docs of those repsective libraries if you'd like to learn more about them.
For the sake of brevity, here's what my styling to the <body> of base.html looks like after a bit of work:
<body id="index" class="home mx-2 px-2">
    <div class="columns pt-2 mt-2">
        <div class="column is-8 is-offset-2">
            <div class="columns mb-0">
                <div class="column is-2 pr-2 mr-2">
                    <header id="banner" class="body">
                        <center>
                            <a href="/">
                                <img src="https://via.placeholder.com/150">
                            </a>
                        </center>
                    </header>
                </div>
                <div class="column is-10">
                    <h1 class="py-1 my-1 is-size-1"><a href="{{ SITEURL }}/">{{ SITENAME }}</a></h1>
                    <p>{% if SITESUBTITLE %} <strong>{{ SITESUBTITLE }}</strong>{% endif %}</p>
                </div>
            </div>
            <nav id="menu">
                <div class="tabs mb-2 pb-2">
                    <ul>
                        <li><a href="/">Blog</a></li>
                        {% for title, link in MENUITEMS %}
                            <li><a href="{{ link }}">{{ title }}</a></li>
                        {% endfor %}
                        {% if DISPLAY_PAGES_ON_MENU %}
                            {% for p in pages %}
                                <li{% if p == page %} class="is-active"{% endif %}><a href="{{ SITEURL }}/{{ p.url }}">{{ p.title }}</a></li>
                            {% endfor %}
                        {% endif %}
                    </ul>
                </div>
            </nav>
            <div class="columns">
                <div class="column is-9">
                    {% block content %}
                    {% endblock %}
                </div>
                <div class="column is-3">
                    {% if DISPLAY_CATEGORIES_ON_MENU %}
                    <div class="box">
                      <h3 class="pb-2">Categories</h3>
                      <ul class="sidebar pl-4">
                          {% for cat, null in categories %}
                            <li{% if cat == category %} class="is-active"{% endif %}><a href="{{ SITEURL }}/{{ cat.url }}">{{ cat }}</a></li>
                          {% endfor %}
                      </ul>
                    </div>
                    {% endif %}
                </div>
            </div>
        <footer id="contentinfo" class="body">
                <address id="about" class="vcard body">
                Proudly powered by <a href="https://getpelican.com/">Pelican</a>,
                which takes great advantage of <a href="https://www.python.org/">Python</a>.
                </address><!-- /#about -->
        </footer><!-- /#contentinfo -->
        </div>
    </div>
</body>
Our them already looks a lot better on a desktop:

...and it even looks passable on mobile thanks to Bulma's responsive grid system:
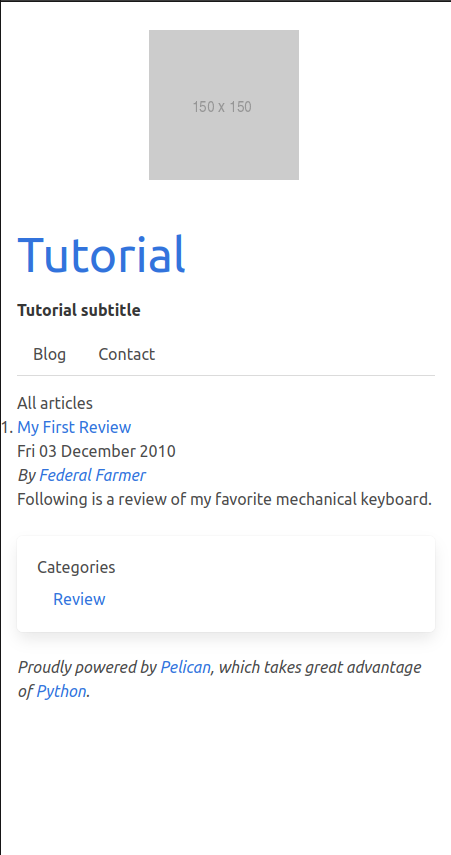
If you're wondering what CSS elements from Bulma I'm using in the above code, they are:
- The Columns grid system to structure the site's element positions
- Tabs-based navigation to style our menu
- Bulma's padding and margin spacing helpers
- A simple box to hold our Categories (I've moved the
DISPLAY_CATEGORIES_ON_MENUblock from the main menu to a sidebar because I think it looks better)
Using these basic principles, you can now go ahead and style all the templates of your theme. You'll see in base.html that there's some Jinja2 for {% block content %}{% endblock %} - this is where Jinja will dynamically add other templates using the extends property. For example, in your article.html file, you'll see the declaration {% extends "base.html" %}, so everything in article.html will be added to base.html wherever it sees the {% block content %} declaration.
This ability to create organized, reusable components makes Jinja2 really powerful, and Pelican is a great library to learn how it works. Since Jinja2 is used in a lot of other Python-based web frameworks like Flask and Django, it's a good skill to have.
To get you started on your own custom theme journey, here are the HTML templates I'd recommend first for further styling:
article.html: Template for individual articlesindex.html: Template for your blogrollpage.html: Template for static pages
The theme we've been creating so far is called Simple and Clean. It's one I wrote to power this blog and is dark mode-centric. Feel free to clone it if you need to see more templating examples or use it outright in your own projects!
Wrapping up
If you've made it this far in the tutorial, eternal thanks for reading the whole thing. I hope it's been helpful to you.
Once you've styled all your templates and have everything lookin' spiffy, we have to do a bit of work to ensure our blog functions well and is easily deployable in production.
Unfortunately, Pelican doesn't include support for multiple Categories on a single article, which I think is a huge oversight. Thankfully, though, Pelican also has a large amount of open-source plugins - so whenever I create a blog using Pelican, I add the more-categories plugin to add this functionality:
pip install pelican-more-categories
Since we've added quite a few dependencies to our project, let's go ahead and lock them to a requirements.txt file:
pip freeze > requirements.txt
Now, when you go to deploy your site, you can easily install all your dependencies to a new venv simply by running:
pip install -r requirements.txt
Deploying Pelican to your VPS of choice is beyond the purview of this tutorial, but expect a future post on that.
We talked a bit about why static sites are important earlier in this article, as the decision to create a static site with bespoke code is as much ideological as it is technical. There are ample technical reasons to favor static blogs over something like WordPress: Better security, faster page load times, lower hosting costs, not breaking your site when updating a simple plugin, etc. But in using static site generators like Pelican, we're also eschewing our reliance on complicated libraries that are completely outside of our control.
Rather than being dependent on third-party server-side infrastructure provided by companies like Automattic or a suite of plugins that may or may not work with our theme, we can very simply roll our own. What's more, we can use Pelican or other static site generators to make useful websites for other people or businesses and make their lives easier.
I can't tell you how many times, as the "tech guy" in my group of family and friends, I've gotten panicked emails about broken WordPress installs due to routine updates or plugin incompatibility (or had it happen to me). You can mitigate some of these risks with proper backups, but how many people actually do that? Had their site been deployed with Pelican, I'd know exactly what broke, because I wrote it. A local farmer friend of mine recently lamented that he no longer updates his WordPress site because it's become "too complicated" over the years.
That's a damn shame, as seemingly "simple" site builders like WordPress were meant to help people like my friend, not make their lives more difficult. But again, that's an article for another day.
If you're a Free Software person who's looking for project ideas, I've got one for you: Make a simple admin panel for Pelican (or Hugo, Jekyll, whatever static site generator you like) to quickly manage posts and pages from a web interface to help people like my farmer friend. It is the current year, after all - it makes no sense that those who toil in the fields should have to fret endlessly over the simple act of updating a website so you and yours don't have to eat zee bugz.
-FF